How to Line up Garage Door Safety Sensors

You likely use your garage door every day, and you depend on it to function reliably and safely whenever you go out or come home. A door that isn’t opening or closing properly can be an inconvenience to your daily routine, and it can also be a potential danger to you and your family if something goes wrong. That’s why it’s important to proactively address any functional issues with your garage door as soon as possible.
If your garage door isn’t working properly, aligning your garage door sensors may be the solution. Even a slight impact can knock the sensors out of alignment, so it’s a common problem you can often resolve with a little troubleshooting.
Do Your Garage Door Sensors Need Aligning?
Garage door sensors are crucial safety features on automatic doors. They emit an infrared beam that can detect people or objects in the path of the garage door. If they detect anything, they’ll prevent the door from closing until the obstruction has moved out of the way. However, these sensors can also prevent the door from properly shutting or opening if they get misaligned.
Look for a few common signs to determine if you need to align your garage sensors:
- Your garage door won’t close at all or only closes part of the way.
- The light on your receiving sensor is flashing on and off.
- Your sensors are visibly bent, crooked or otherwise not pointing directly at each other.
Where Are Garage Door Sensors Located?
You’ll find the garage door safety sensors on each side of the garage door, 4 to 6 inches off the floor and near the tracks. Their low placement allows them to detect low or short objects in the door’s path, such as pets and children.
Each sensor emits an infrared beam that can be red, green, yellow or orange. These colors indicate the sensor’s status, but the meaning of each color varies depending on the manufacturers and models. They also help you locate the sensors and identify an alignment issue.
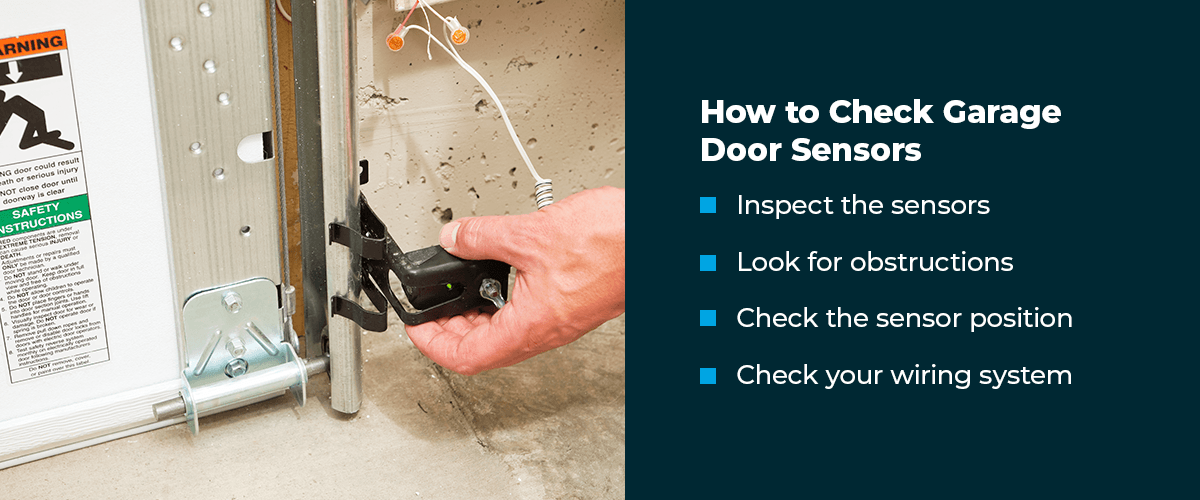
How to Check Garage Door Sensors
If your garage door isn’t working as expected and you suspect an alignment issue, here’s how to check garage door sensors:
- Inspect the sensors: Most sensors have indicator lights. A steady light usually means the sensor is working, while flashing or no light can signal a problem.
- Look for obstructions: Sometimes sensors can be particularly sensitive to potential obstacles in the vicinity, so make sure you clear the area all around the garage door.
- Clean the sensors: Dust, dirt or cobwebs can interfere with the infrared beam. Gently clean the sensor with a damp cloth to ensure it can clearly detect the opposite sensor’s ray.
- Check the sensor positions: Make sure your sensors are completely straight and pointing at each other. You can check their angle by tying a string to each end and using a level to see if the line is straight.
- Check your wiring system: In some cases, you might need to inspect the electrical wiring for your garage door. Wear and tear, the elements or even pests like rodents might have broken or otherwise compromised the wiring system, so make sure it’s in good repair.
How to Line up Your Garage Door Sensors
When you know how to line up your garage door safety sensors, you can address issues that come up with them more easily. Remember as you work, however, that safety is your top priority. Be sure to call a professional if the situation is more complex than you expected.
Follow these easy steps to reset garage door sensors:
1. Turn Off the Power Supply to Your Garage
The first step is to unplug the garage door opener or cut off the power to your garage using the circuit breaker. Be sure you prioritize safety when you’re touching the breaker by wearing safety glasses or electricity-resistant gloves.
2. Loosen Screws Holding Sensors in Place
Gently loosen the mounting screws on both sensors so you can move and adjust them as needed. Remember not to take them all the way out because you’ll only be moving the mounting brackets up and down when lining up the garage door sensors.
3. Slide Down the Sensors
Make sure the brackets can move freely and slide down each sensor as far as possible. To avoid leaving marks on the sensor’s surface, you should use your bare hands instead of tools to move it.
4. Connect the Two Sensors With a String
Tie a string around one sensor and move it across the garage door opening, and tie around the other sensors as straight and firm as possible. Try to tie the string so that it runs across the center of both garage door sensors.
5. Adjust the String
Position a level against the string to make sure it’s straight and the sensors are aligned. Move each sensor up or down until the string is level, ensuring both sensors face each other directly.
6. Tighten the Screws
Once the sensors are properly aligned, securely tighten the screws to the mounting brackets. You should tap them gently to be certain that they won’t shift from their new position. Getting this step right is crucial if you want to line up garage door safety sensors correctly.
7. Check if Sensors Are Aligned
Remove the strings and restore power to your garage and test the sensors. If the door moves smoothly without backing up, you’ve successfully lined up the garage door sensors.
Turn to idcAutomatic for Your Garage Door Service Needs
If you’ve carefully checked and lined up your sensors and they still don’t work, or you’ve discovered that your garage door requires more serious repairs, call a trusted repair company like idcAutomatic for further assistance. When you need professional services and repairs for your garage door, give us a call at 763-786-4730 or fill out our online service request form to get prompt, reliable help.
